
Site Preparation and Layout
Proper site preparation forms the foundation of any successful slab project. Before mixing a single bag of material, you need to establish a level, stable base that will support the weight and prevent future cracking or settling.
Start by marking your project boundaries with stakes and string lines. Use a measuring tape to verify that your layout is square by checking diagonal measurements, which should be equal for rectangular shapes. Once your perimeter is defined, excavate to a depth that accommodates both your base material and the thickness of your finished surface, typically 6 to 8 inches total.
Remove all organic material, roots, and loose soil from the excavation area. Organic matter decomposes over time and creates voids that lead to settling. In the Elkton region, clay-rich soils are common and require extra attention to drainage and compaction to prevent moisture-related movement.
Install a 4-inch layer of compactable gravel or crushed stone as your base. This layer provides drainage and a stable platform. Rent a plate compactor to thoroughly compact the base in multiple passes, ensuring the material is firm and level. Check the grade with a long straight edge and a level, making adjustments as needed before proceeding.
Building Forms and Reinforcement
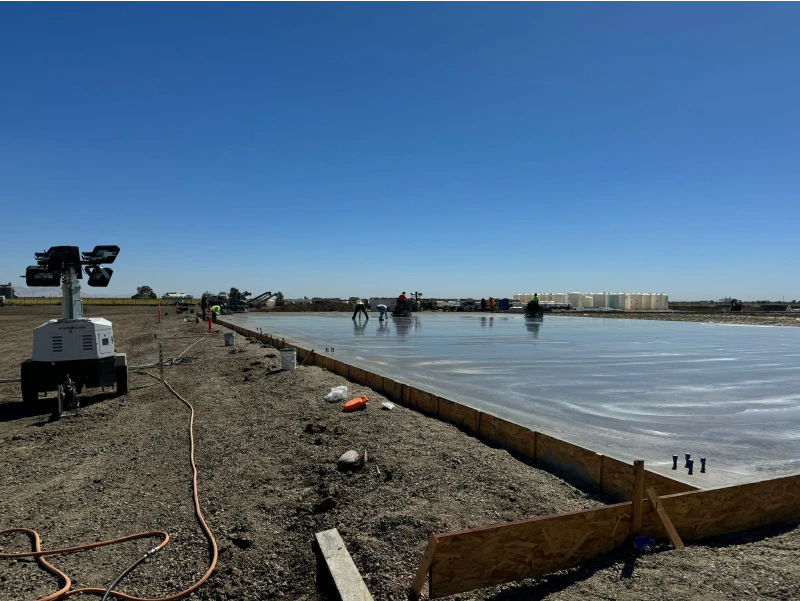
Forms create the perimeter that contains the wet mix and establishes the final dimensions and elevation of your project. Use straight 2×4 or 2×6 lumber for forms, securing them with wooden or metal stakes driven at least 12 inches into the ground every 3 to 4 feet along the perimeter.
Set your forms to the desired finished height, using a builder’s level or laser level to ensure consistent elevation throughout the project. Secure the forms firmly, as the weight and pressure of wet material can shift poorly anchored boards. Apply form release oil to the inside face of the boards to make removal easier after the material has cured.
Reinforcement significantly increases the strength and longevity of your slab. For most residential applications, use welded wire mesh or rebar grid positioned in the center of the slab thickness. Place the reinforcement on small plastic or metal chairs that elevate it approximately 2 to 3 inches above the base, ensuring it remains centered when the mix is poured.
Overlap mesh sections by at least 6 inches and tie them together with wire to create a continuous reinforcement plane. If using rebar, create a grid pattern with bars spaced 18 to 24 inches apart in both directions, tying intersections with wire. This steel framework distributes loads and controls cracking as the material cures and experiences temperature changes throughout Virginia’s seasonal variations.
Mixing and Pouring Techniques
Calculating the correct volume ensures you have enough material to complete your project in one continuous pour, which is critical for structural integrity. Multiply length by width by thickness (all in feet) to get cubic feet, then divide by 27 to convert to cubic yards. Add 10 percent to account for waste and minor variations in excavation depth.
For small projects under 1 cubic yard, mixing bags manually or with a portable mixer is feasible. For larger slabs, ordering ready-mix delivery is more practical and ensures consistent quality. If mixing manually, follow the manufacturer’s water-to-mix ratio precisely. Too much water weakens the final product, while too little makes the material difficult to work and finish properly.
Begin pouring at the farthest corner from your access point and work backward toward the exit. Pour the mix directly onto the prepared base, distributing it evenly within the forms. Use a square-nose shovel or rake to spread the material, pushing it into corners and along the form edges. Avoid overworking the mix, which can cause segregation and weaken the surface.
Once the forms are filled, use a straight 2×4 screed board that spans the width of the forms. With a helper, move the screed board across the surface in a sawing motion, leveling the material flush with the top of the forms. Make multiple passes, filling low spots with additional material as needed. This screeding process creates the initial flat surface that you will refine with subsequent finishing steps.
Finishing and Surface Treatment
After screeding, allow the surface to rest until the water sheen disappears and the material can support your weight on knee boards without leaving deep impressions. This waiting period varies based on temperature, humidity, and mix design, typically ranging from 30 minutes to several hours. Working too early causes surface defects, while waiting too long makes finishing difficult.
Use a bull float to smooth the surface and embed aggregate slightly below the surface. Push the float across the slab with the leading edge raised slightly, then pull it back flat. This action levels ridges and fills small voids left by the screed board. For smaller projects, a hand float or darby serves the same purpose.
Once the surface has firmed enough to support your weight on knee boards, use a hand trowel or power trowel to create the final finish. For exterior applications like patios or walkways, a moderately smooth finish provides adequate traction. Interior floors often receive multiple trowel passes for a denser, smoother surface.
Control joints prevent random cracking by creating intentional weak points where cracks will form in straight lines. Cut control joints to a depth of one-quarter the slab thickness, spacing them at intervals no greater than two to three times the slab thickness in feet. For a 4-inch slab, joints should be placed every 8 to 12 feet in both directions. Use a groover tool while the surface is still workable, or saw-cut joints within 12 to 24 hours after placement.
Edge the perimeter with an edging tool to create a rounded corner that resists chipping. Run the edger between the form and the surface, creating a smooth, durable edge that will remain intact after the forms are removed.
Curing and Aftercare
Proper curing is the most critical factor in achieving maximum strength and durability. The chemical reaction that hardens the material requires adequate moisture and favorable temperatures for at least seven days, with full strength developing over 28 days.
Immediately after finishing, cover the surface with plastic sheeting, burlap, or apply a liquid curing compound. Plastic sheeting is the simplest method: lay it flat over the entire surface, overlapping seams by at least 12 inches, and weight down the edges to prevent moisture loss. If using burlap, keep it continuously damp by spraying with water several times daily.
Maintain consistent moisture and temperature conditions throughout the curing period. In warmer months common to Virginia summers, frequent misting or continuous water ponding helps prevent rapid drying that causes surface cracks. During cooler spring or fall conditions, insulated blankets may be necessary to maintain adequate temperatures above 50 degrees Fahrenheit.
Avoid foot traffic for at least 24 hours and keep vehicles and heavy loads off the surface for at least seven days. Remove forms carefully after 24 to 48 hours, taking care not to chip edges. Backfill around the perimeter if needed, ensuring positive drainage away from the slab.
While this guide provides the fundamental steps for a successful DIY project, complex installations, large-scale work, or projects requiring precise engineering often benefit from professional expertise. Experienced contractors bring specialized equipment, quality control, and the efficiency that comes from years of hands-on work. When your project demands flawless execution, professional services ensure results that stand the test of time.